Hey guys!!! Happy Monday!! I know a lot of people dread Monday, but I absolutely love Monday – it is the first day of my planner and I love seeing all the things I can accomplish in the upcoming week. Since the countdown to Christmas has begun (after Thanksgiving right?) I figured I could share this project Presley and I put together this last week with Craftables.
So for this project you will need:
Plywood
Framing wood pieces
Paint
Stain
Vinyl
Wood Glue
Hanging Hardware
Thats it! Easy peasy! Of course, with any DIY you can fit the project to your budget. I love keeping my projects around $10 because if it is going to cost me a lot of money, I’d rather save the time and just buy it – plus, I like finding ways to do things for a fraction of the cost. It’s like this competitive side of me comes out to see how much money I can save!
So for this one, I grabbed some Plywood I had sitting in the garage. Plywood is my favorite for this DIY Paint/Vinyl sign because it is incredibly cheap, lightweight and the top is super level and perfect for applying even layers of paint and vinyl with no bubbles or imperfections. This plywood (the dark wood that is being cut by a Home Depot employee in the photo below) comes in a huge sheet that we cut down into 3 even sections at Home Depot to transfer it home a little easier. I ended up cutting down 1/3 of the piece, in half – but you can easily have Home Depot cut it down to whatever size you’d like. Your first few cuts are free, and then afterwards it is around 50cents per cut (but totally worth it if you don’t have the option to cut at home). This huge sheet of plywood (which would make SIX of these Christmas signs) is around $8-10 dollars for the entire sheet!
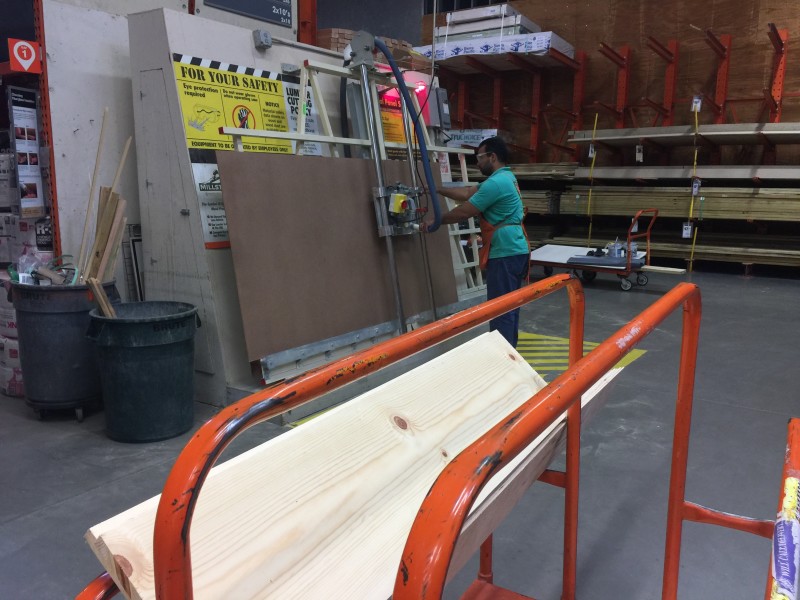
So, this piece on the floor is 1/3 of the full plywood sheet, so one sheet can go a long way if you have multiple projects to do (I’ve got an engineer print and a chalkboard in progress with the other 2 pieces). I chose to use frog tape to section off the portion of the board I was working with before I cut it down, but you could always cut your piece first. I just eyeballed it and guessed about how big I wanted my sign to turn out.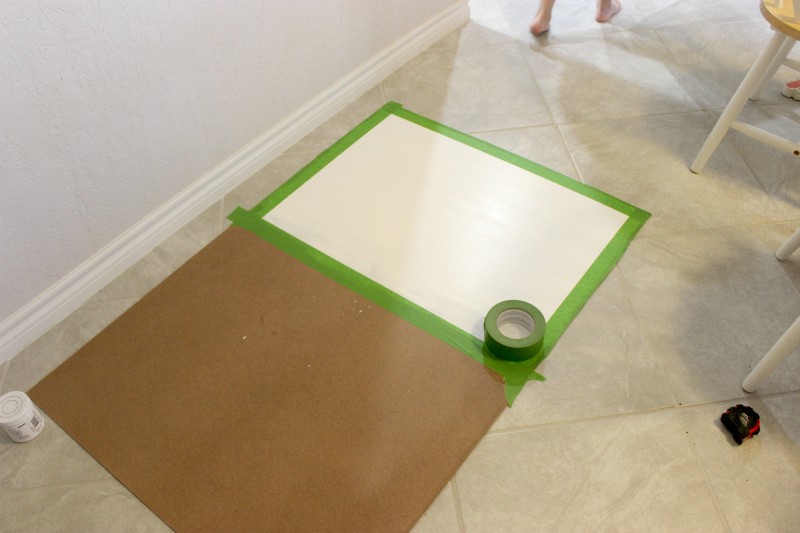
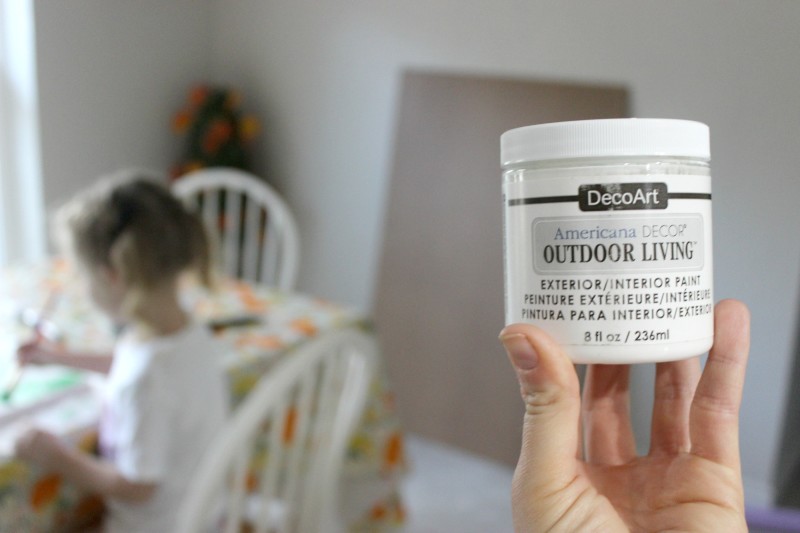
I used my all time favorite DecoArt paint to give myself a good white base. I absolutely love the Outdoor Living line (but the Chalky finish is tied for first place!) – in Everlasting for a nice bright white background. (Find all my DecoArt projects HERE).
Then I got to work on creating my design in Silhouette to print on my new Craftables Vinyl. If you have a vinyl cutting machine like the Cameo this is a a standard vinyl cut (with no mat to print longer than 12 inches) – if you don’t have a Silhouette BUY ONE! Kidding, you can use the print and trace method like this tutorial, and if you are working with enlarged graphic use this tutorial, or if you are talented you can just hand draw and paint it in.
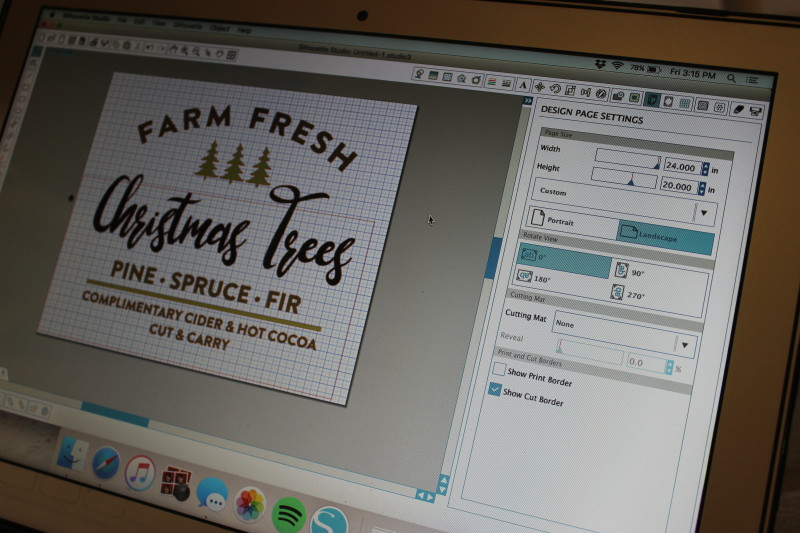
I was going to custom make my design, but then found it in the Silhouette Design Store for 99c and couldn’t help but want to save a little time and support this artist – so I purchased it and saved myself thirty minutes. (Silhouette Design Store: #228504).
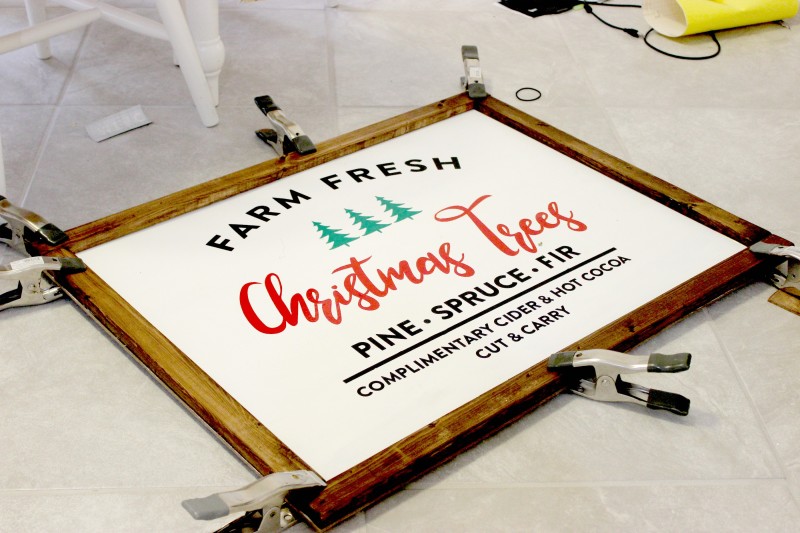
After cutting and applying the vinyl by color: First Red, then Black and then Green I grabbed my frame pieces. These are amazing and I always have like 5 of them in the garage for projects like this. They are around 6 feet long and 88cents. They are a pain to sand down but they stain beautifully and make the most perfect frames for these DIY signs. Again, if you have the ability to cut these at home it is perfect because then your project doesn’t have to be perfectly planned at the store. I usually paint and vinyl my projects and then cut my frame pieces once at a time to make sure they line up perfectly. But, if you don’t have the ability to cut, just ask the person at Home Depot cutting your plywood to cut down these small pieces to frame your plywood.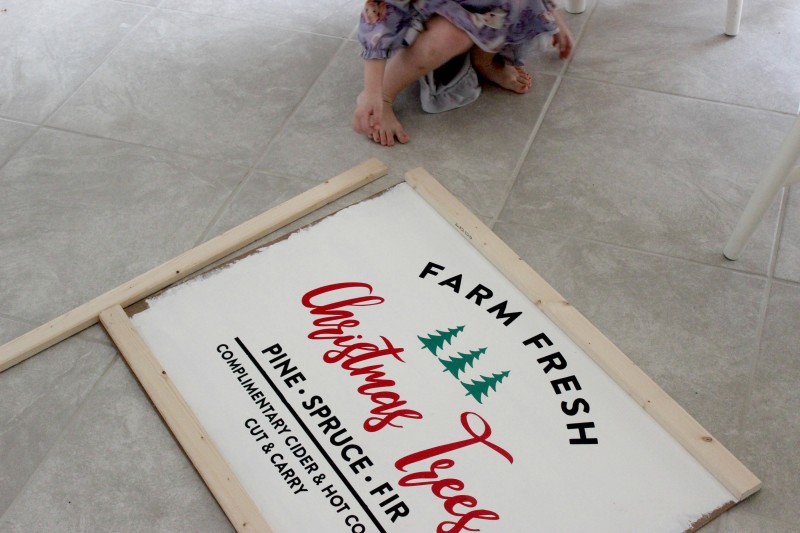
I found this Rust-Oleum Stain in Dark Walnut at our local Habitat for Humanity for $3 and it is absolutely breathtaking. Is it the most perfect dark rich brown I want to eat it it is so gorgeous. I paint it on, let it sit for 3-4 minutes and then use my stain cloth (an old washcloth) to wipe off any excess stain that hasn’t soaked in. I let those dry for about 2 hours, and then use some wood glue and clamps to add those to the sides.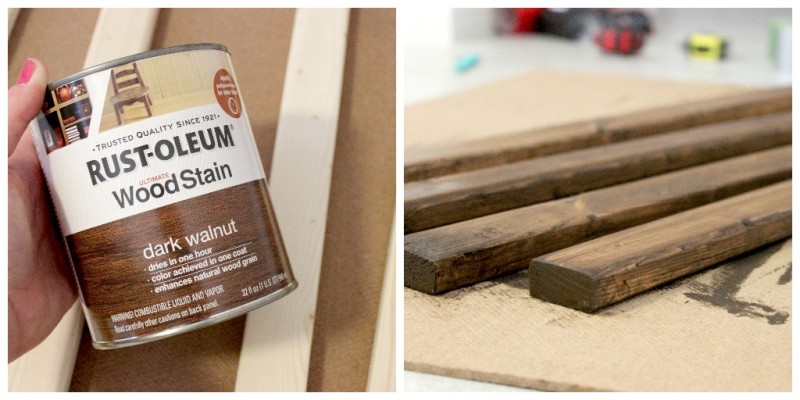
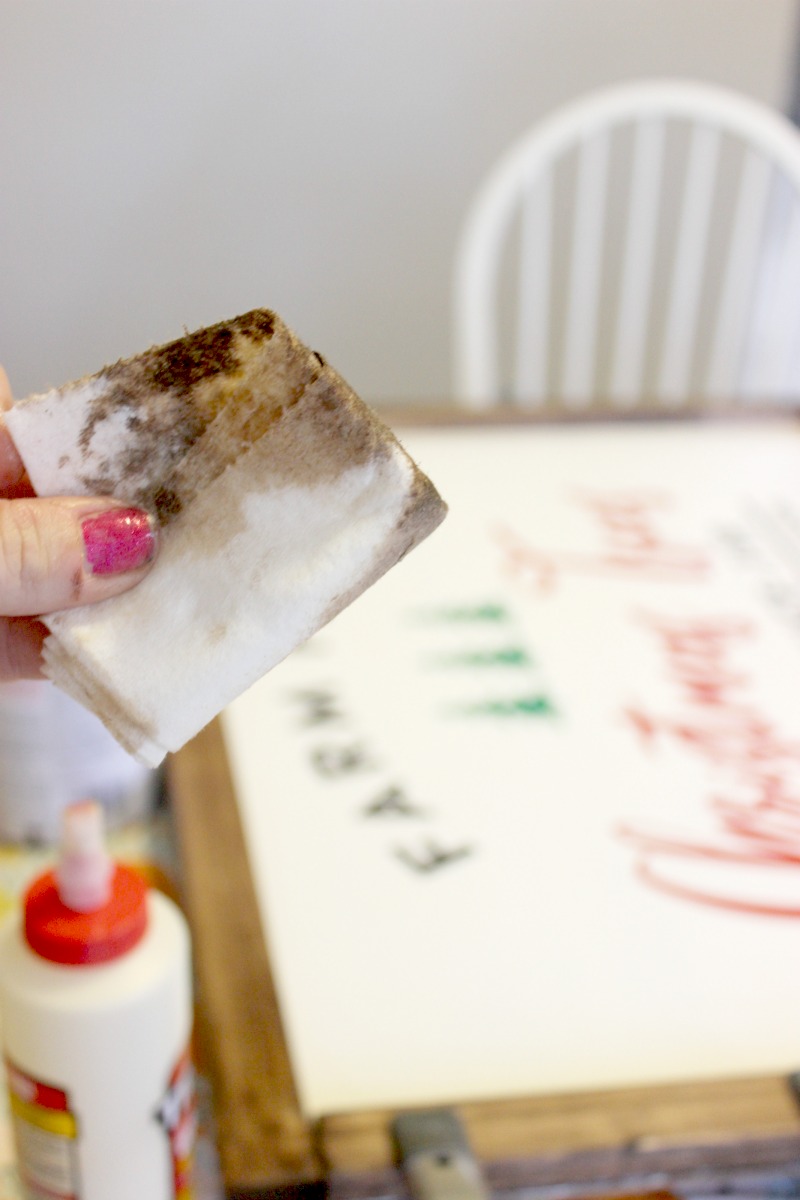
 Then, to add a little bit of rustic-ness to this sign, I took a paper towel, dipped it in the top of my stain and rubbed that over the entire sign and it gave it the most perfect tint.
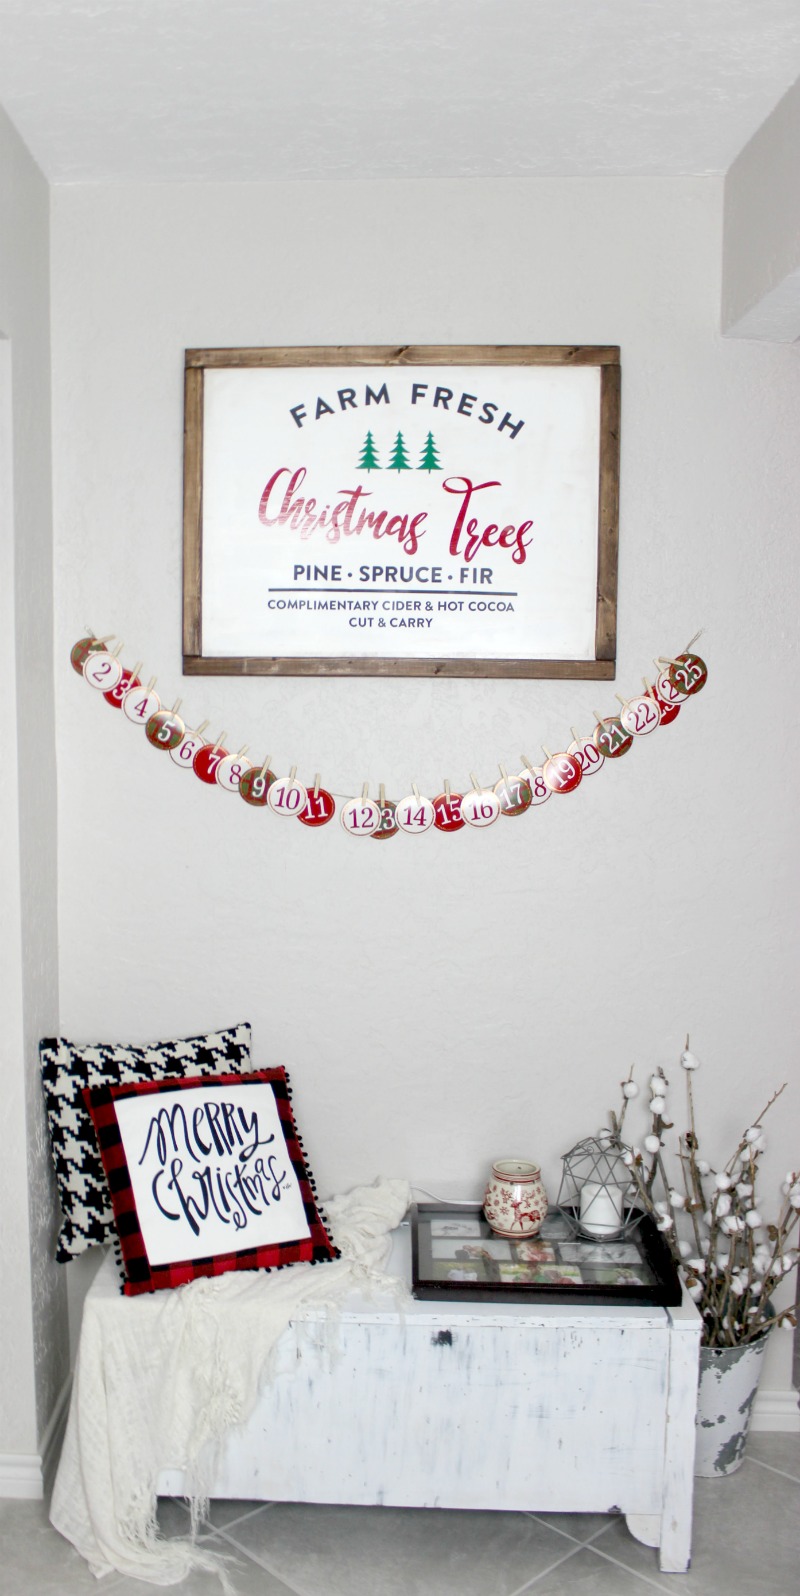
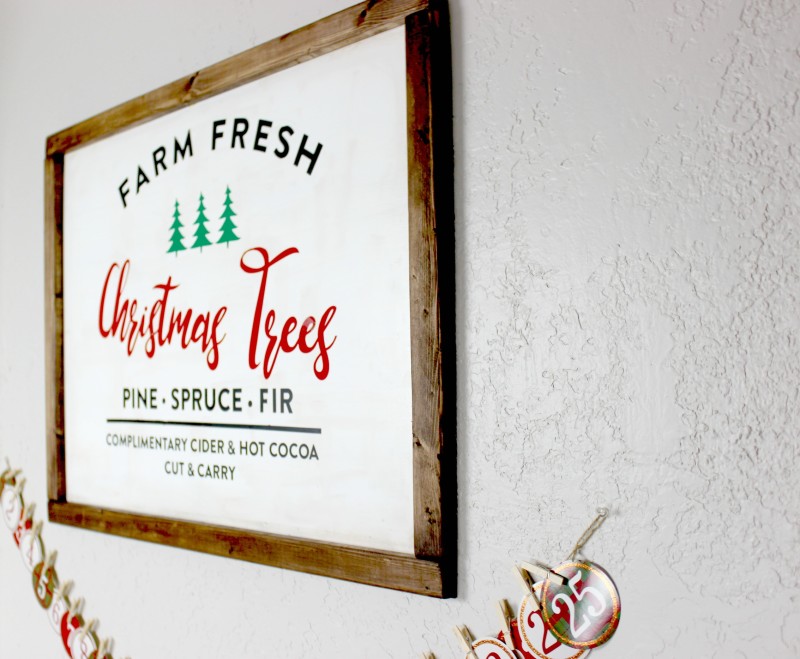
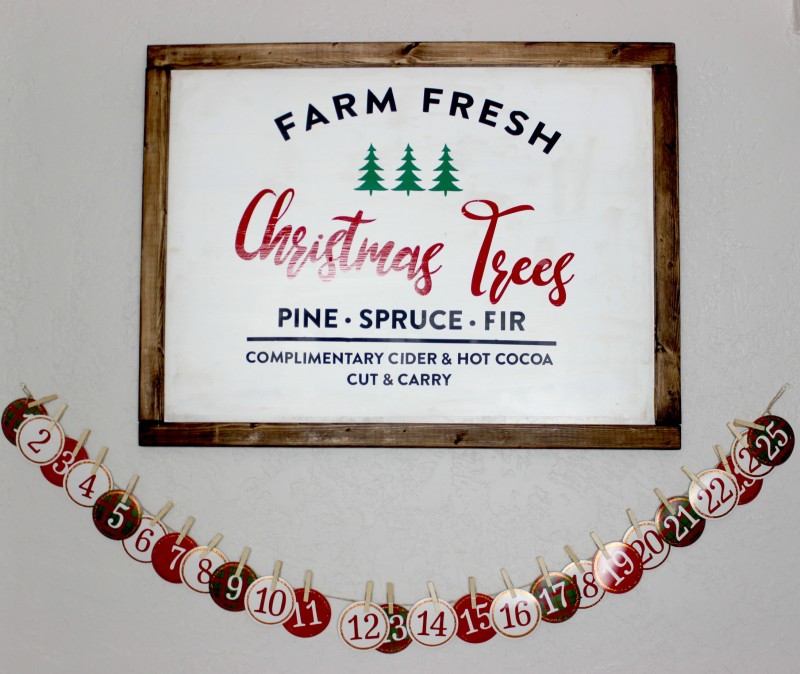
 Then, you can seal it with a top coat or just let it be. I added some hanging hardware to the back and then hung it up in our entryway. SO freaking cute!

Now, what do we make next with our new Craftables Vinyl? I’m thinking some HTV t-shirts?!
Make sure you are following me on Instagram for all the latest and greatest.

You are so dang talented. That looks like a lot of work and you made it look so easy!!!